Wednesday, 16 April 2014

Amazing You...


A lovely friend of mine has been going through some tough stuff recently and I just wanted to let her know how amazing she is. 
Everything Eleanor is a set I have wanted for a while but until I discovered my 'inner floral' it was one that I passed by. Wow has it had some use recently!! It's also one that requires fussy cutting and those that know me will know I like 'simple'. I'm a simple girl and simple suits me lol.

I used a new colour combination for me of Island Indigo, Pool Party and Rose Red.

A close up of the 'fussy cut' flower image shows just how lovely this set is and the wonderful detail on the stamps.  


Till next time - Happy Crafting

Tuesday, 15 April 2014

Sneak Peek...


I thought I would share a sneak peek of one of my retreat projects today. This was inspired by the lovely Cal over at He[art]fully yous. At our Annual Convention in Manchester last year Cal showcased the most wonderful projects using the Spiral Flower die. 

I have been wanting to play for ages and the perfect opportunity came from my need to plan a retreat project and to save time I made it one that could be included in a wedding window display at my favourite Cupcakery. 

I combined the Stampin' UP! Spiral Flower Die with hand cut ones using Stampin' UP! Circle Framelits. The circles are much more time consuming but the contrast in sizes between the flowers really enhances the beautiful large flower created using the Spiral Flower Die.

Till next time - Happy Crafting

Monday, 14 April 2014

Monday Muse....


Sometimes when crafting your mojo goes awol and it's always good to know how to give it a kickstart. For me if I have hours to spare (never!!!) I head to Pinterest, but when time is tight and lets face it for most of us that is the case, I head for a quick mooch around the blogs.

With this in mind and the need to get myself back into regular blogging I decided to dedicate Mondays to kickstarting the mojo and also to showcase some of my favourite bloggers. 

This card is a version of one I saw on Sam's Blog. 

As you can see I have simplified it a little but the general feel of the card is the same. I also made this card using 3 of our pink colours.

  
Till next time - Happy Crafting

Monday, 7 April 2014

I'm Back....

It's been a while and to be honest there is no other reason than life just got in the way... With 4 kids, dogs and a partner in the RAF life doesn't always go to plan!

I have been busy behind the scenes with my crafting and building my business slowly. I promoted to Bronze 3 within my first year under a new upline and now have a team of my own with 2 downline and classes are getting busier. However my business took an unexpected turn after a local Cupcakery asked if they could stock a small basket of my cards. I have become fantastic friends with June and Andy who own and run Lady B's Cupcakery  and they have supported this addition to my business unbelievably!

I now supply cards to 3 local businesses which you can imagine keeps me busy.

I have taken some time to look at the management of my day to day business and have structured my working day to allow more efficient working. I have also allowed time for more regular blogging so I hope you will bear with me and I look forward to sharing some recent creations with you over the next few days, weeks and months.

Till then Happy Crafting

Sunday, 15 September 2013

Stampin' UP! Swallowtail....

Hello....
It's been a while but with the Nutty One still in Afghan and the kids off on school holidays there just never seemed to be enough hours in the day. 
We are finally back into a routine and with only 5 weeks left till the Nutty One returns I can finally update my blog. 
I was busy crafting over the summer when time allowed and thought I would share with you one of the projects from my new Mermaid Makes Class.
These new classes are run every 3 months and included in the cost of the class is a bumper bag full of Stampin' UP! product. These classes are run slightly differently in that I have lots of samples on display, all of which can be made from the contents of the kit. Each person then decides which projects they would like to do and away they go... I am on hand as always to assist and encourage 'artistic license' 

This project is an 8"x8" page however the Swallowtail stamp overhangs the edges slightly. 
The papers used are Modern Medley and the punch is the new Hexagon Punch.

I used Stampin' Up! reinkers mixed with a little Isopropanol Alcohol to colour the image and also to provide some interest to the background. 

As you can see below the Swallowtail Stamp was first stamped onto the page then stamped again and cut out, mounted on Stampin' UP! Dimensionals to give depth.


A few randomly placed Stampin' Up! Rhinestones add a little bling.

I hope you enjoyed this project and for more information on how to purchase the products used or on my classes then please use the "contact me" button on the top right.

HAPPY CRAFTING

Saturday, 3 August 2013

Hello to all of you joining us on our New Catalogue Blog hop. I hope you have made yourselves comfortable for a creative tour of some of the new goodies in the Stampin' UP! 2013-2014 catalogue.
You will have hopped here from the lovely Nicky who has some lovely projects I'm sure you will agree.

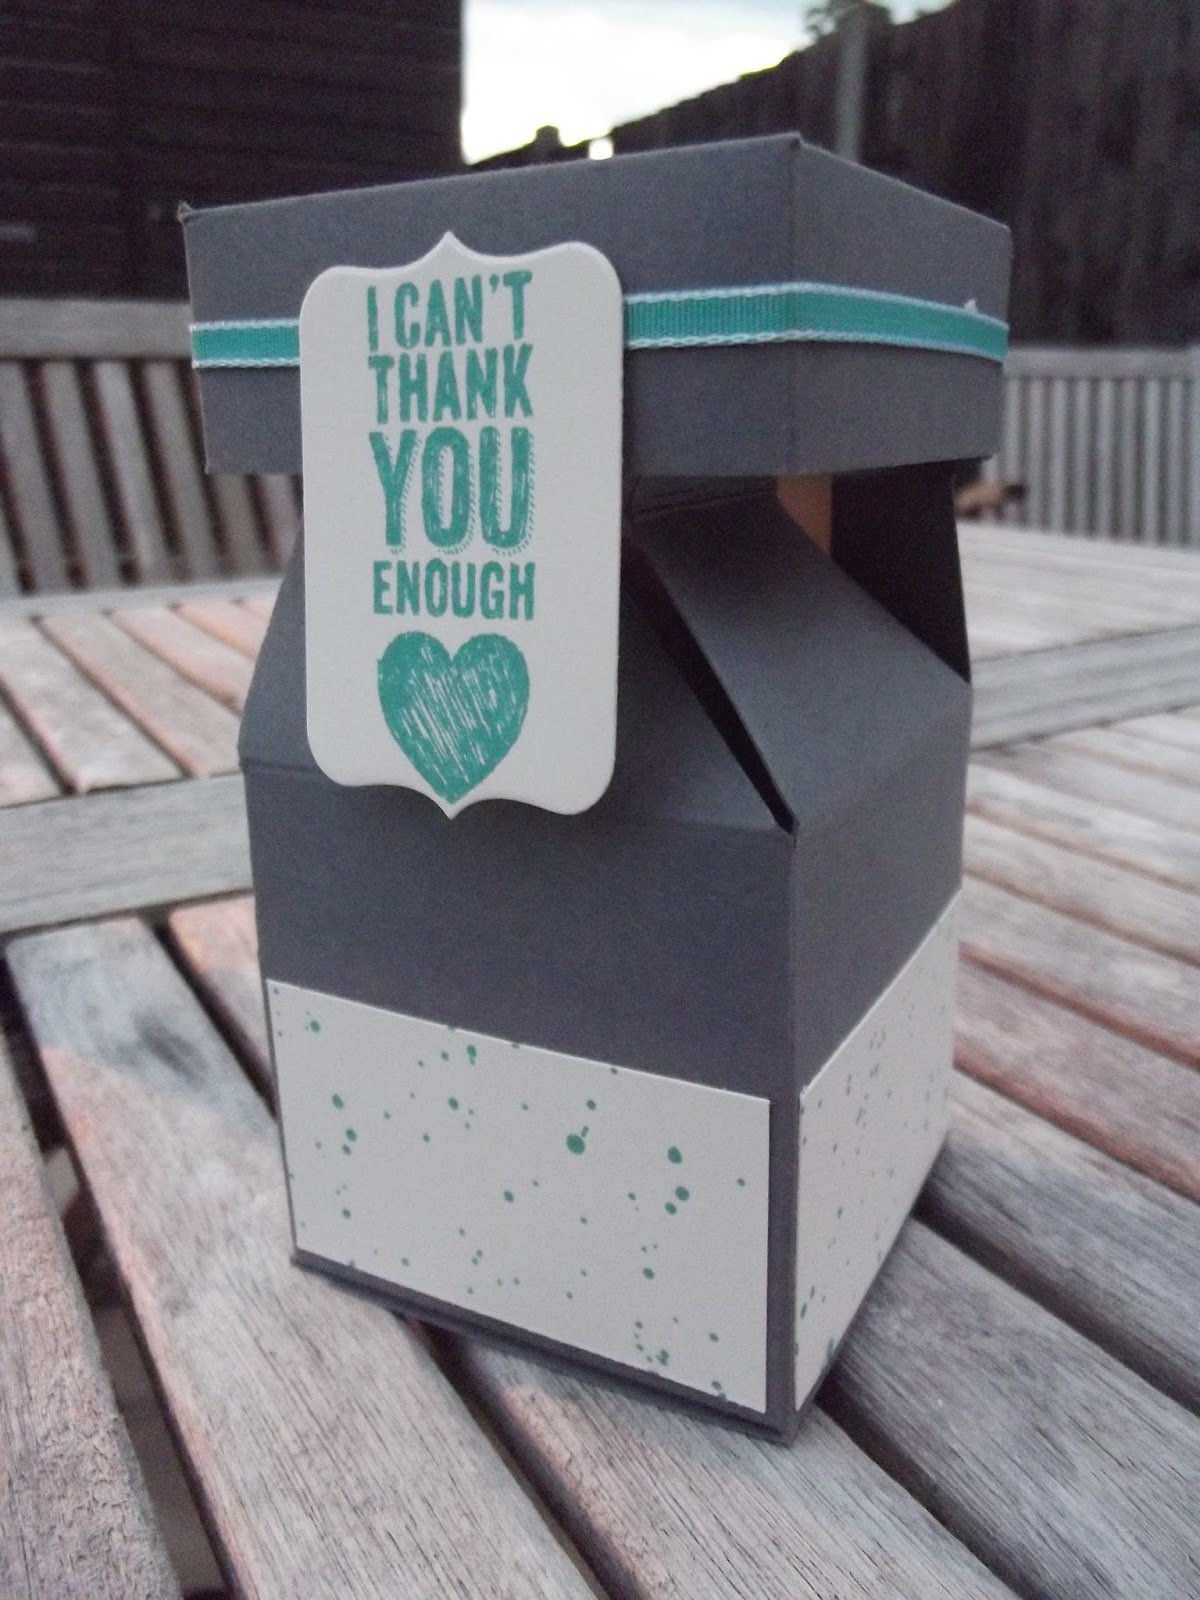
I wanted to go down the masculine route with my first project as I know we all struggle to craft for the men in our lives. 
I used Chalk Talk for both sentiments and made them the feature. The backgrounds are done with Gorgeous Grunge which is fast becoming my 'go to' set and  is fab for mens cards and gifts.
Colour wise I went for Basic Grey and 2 new colours to our pallete - Smokey Slate and Bermuda Bay. 


Here is a close up of the card


The front of the box which appears to be a normal box but hides a very clever trick. This box is one that the lovely Zoe showed me when I went over to see her recently. 


Here you see the opening which is like the end of a cracker. It's such a lovely way to present a gift.


Finally, even with the lovely hot weather we have been having we can't as crafter's ignore the fact that Christmas is coming so I have 2 cards to show you that both use Mosaic Madness.
This lovely stamp set has a matching punch and embossing folder!
It has a very Moroccan feel to the set but as you can see is versatile enough to double as Christmas Ornaments.


The same concept here but using a darker colour scheme and some Bakers Twine


I do hope you enjoyed today's hop around the desks of some of the Stampin' UP! demos and we have inspired you to try out some of the new goodies we have on offer. 
If you would like more details on any of the products or classes then please contact me using the button (top right).

Now onto the talented Ruth to continue the hop.

Wednesday, 24 July 2013

Ribbon Swatch Tutorial

Good Morning all...
The sun is trying hard to shine by the seaside and it looks like being another lovely day. The kids are all on summer holidays now so we are enjoying a lay start to the day. 
While chatting with some of my other demo friends I came across a question about ribbon swatches and the best way to show our gorgeous ribbons off to customers. 
Here is the way I do it and a short picture tutorial on how to achieve the same look. 

This is my swatch from last year. I will be using the time over summer to update it with all the new ribbons

To make these all you need is....


I also use a seed bead threaded onto the eye pin to give extra security. 


Once the seed bead is threaded onto the eyepin I start putting the ribbons on. It's fairly easy to push the pin through the ribbons. 
I have only threaded one ribbon so you can see the components clearly but you will need to thread all your ribbons on at this stage.


Once all the ribbons are on you will need to put the bead cap on. These come in lots of different styles so you will have fun choosing them too. 


Next is the swivel clip or you can just use a jump ring. I use the swivel clip to allow me to take each ribbon swatch off the main ring easily. 


Here I have removed the swivel clip just for the purpose of taking the picture. You need to bend the eyepin over and trim so that the free end tucks back into the bead cap. Make sure you have tucked it in well. 


Here is the finished swatch. Of course yours will have more ribbons on but it was easier to take photos this way.


Please pop back and let me know how you get on. It's really easy to do (if a little fiddly) and your customers will love being able to see the ribbons in all their technicolour lovelyness!!!

I hope you all have a lovely day whatever you are doing .