Sunday 15 September 2013

Stampin' UP! Swallowtail....

Hello....
It's been a while but with the Nutty One still in Afghan and the kids off on school holidays there just never seemed to be enough hours in the day. 
We are finally back into a routine and with only 5 weeks left till the Nutty One returns I can finally update my blog. 
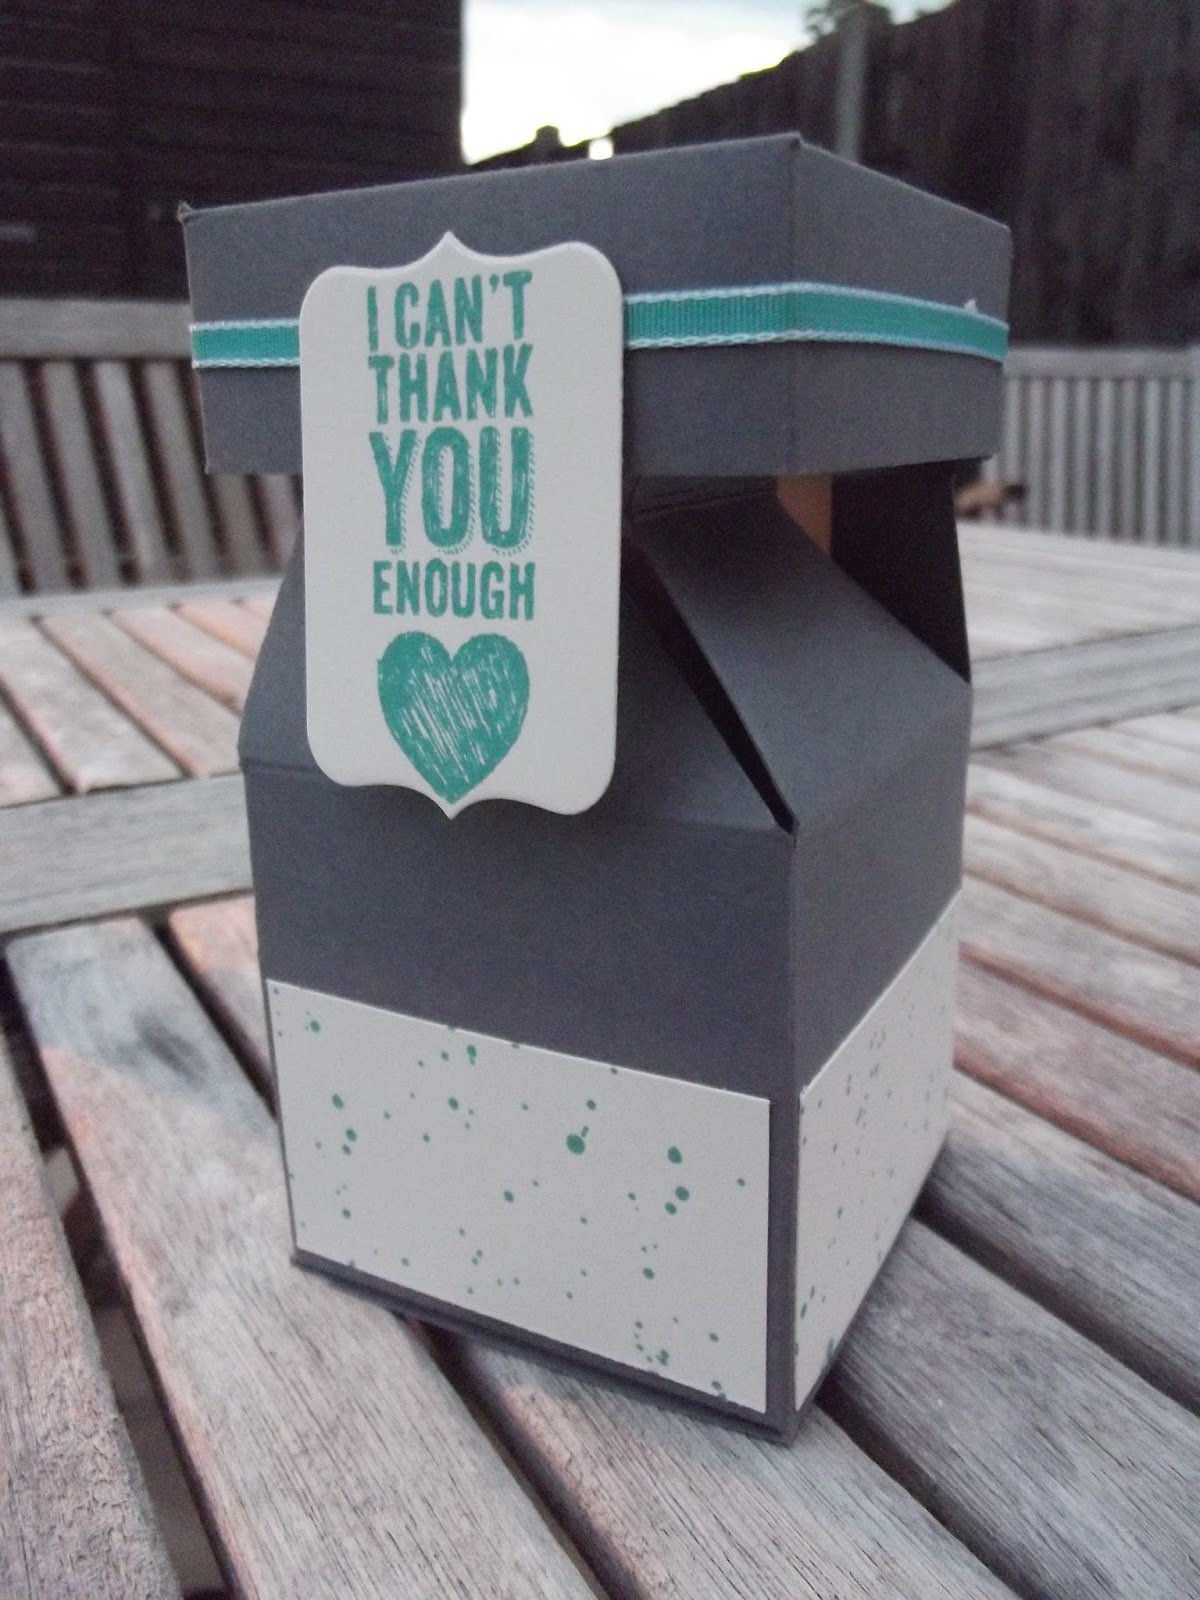
I was busy crafting over the summer when time allowed and thought I would share with you one of the projects from my new Mermaid Makes Class.
These new classes are run every 3 months and included in the cost of the class is a bumper bag full of Stampin' UP! product. These classes are run slightly differently in that I have lots of samples on display, all of which can be made from the contents of the kit. Each person then decides which projects they would like to do and away they go... I am on hand as always to assist and encourage 'artistic license' 

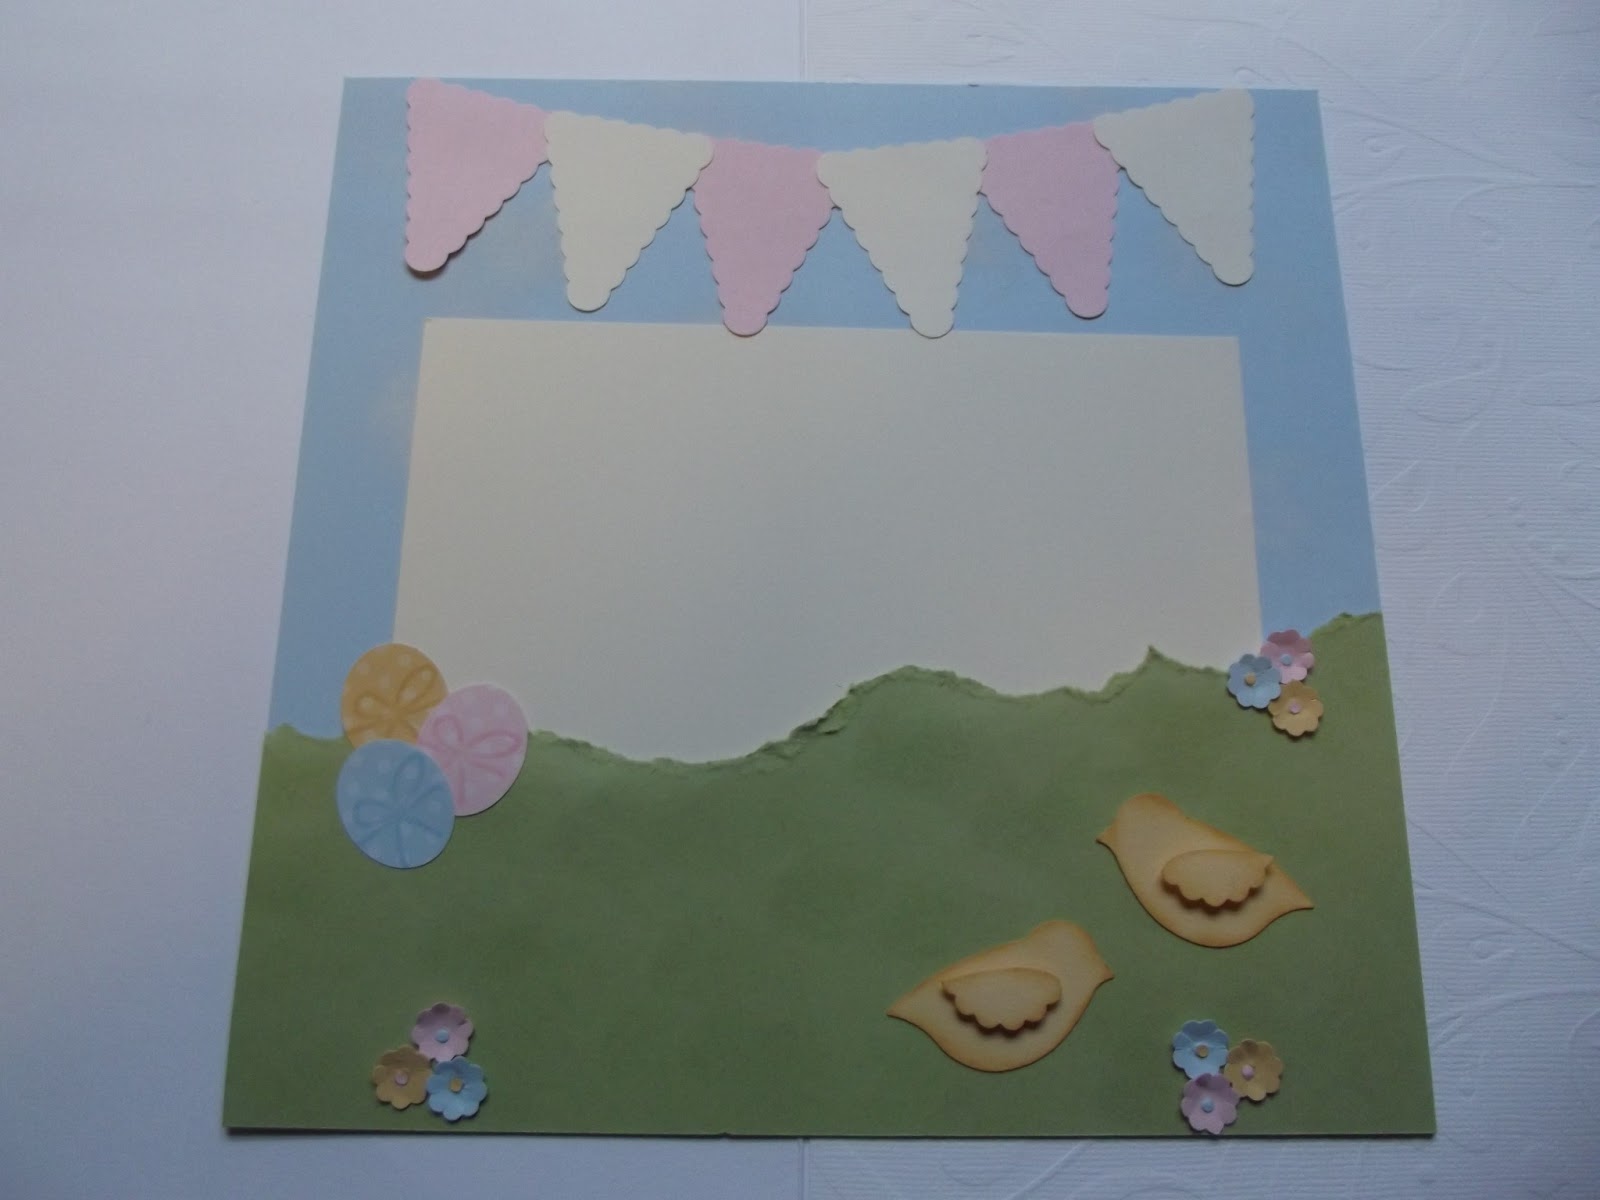
This project is an 8"x8" page however the Swallowtail stamp overhangs the edges slightly. 
The papers used are Modern Medley and the punch is the new Hexagon Punch.

I used Stampin' Up! reinkers mixed with a little Isopropanol Alcohol to colour the image and also to provide some interest to the background. 

As you can see below the Swallowtail Stamp was first stamped onto the page then stamped again and cut out, mounted on Stampin' UP! Dimensionals to give depth.


A few randomly placed Stampin' Up! Rhinestones add a little bling.

I hope you enjoyed this project and for more information on how to purchase the products used or on my classes then please use the "contact me" button on the top right.

HAPPY CRAFTING

Saturday 3 August 2013

Hello to all of you joining us on our New Catalogue Blog hop. I hope you have made yourselves comfortable for a creative tour of some of the new goodies in the Stampin' UP! 2013-2014 catalogue.
You will have hopped here from the lovely Nicky who has some lovely projects I'm sure you will agree.

I wanted to go down the masculine route with my first project as I know we all struggle to craft for the men in our lives. 
I used Chalk Talk for both sentiments and made them the feature. The backgrounds are done with Gorgeous Grunge which is fast becoming my 'go to' set and  is fab for mens cards and gifts.
Colour wise I went for Basic Grey and 2 new colours to our pallete - Smokey Slate and Bermuda Bay. 


Here is a close up of the card


The front of the box which appears to be a normal box but hides a very clever trick. This box is one that the lovely Zoe showed me when I went over to see her recently. 


Here you see the opening which is like the end of a cracker. It's such a lovely way to present a gift.


Finally, even with the lovely hot weather we have been having we can't as crafter's ignore the fact that Christmas is coming so I have 2 cards to show you that both use Mosaic Madness.
This lovely stamp set has a matching punch and embossing folder!
It has a very Moroccan feel to the set but as you can see is versatile enough to double as Christmas Ornaments.


The same concept here but using a darker colour scheme and some Bakers Twine


I do hope you enjoyed today's hop around the desks of some of the Stampin' UP! demos and we have inspired you to try out some of the new goodies we have on offer. 
If you would like more details on any of the products or classes then please contact me using the button (top right).

Now onto the talented Ruth to continue the hop.

Wednesday 24 July 2013

Ribbon Swatch Tutorial

Good Morning all...
The sun is trying hard to shine by the seaside and it looks like being another lovely day. The kids are all on summer holidays now so we are enjoying a lay start to the day. 
While chatting with some of my other demo friends I came across a question about ribbon swatches and the best way to show our gorgeous ribbons off to customers. 
Here is the way I do it and a short picture tutorial on how to achieve the same look. 

This is my swatch from last year. I will be using the time over summer to update it with all the new ribbons

To make these all you need is....


I also use a seed bead threaded onto the eye pin to give extra security. 


Once the seed bead is threaded onto the eyepin I start putting the ribbons on. It's fairly easy to push the pin through the ribbons. 
I have only threaded one ribbon so you can see the components clearly but you will need to thread all your ribbons on at this stage.


Once all the ribbons are on you will need to put the bead cap on. These come in lots of different styles so you will have fun choosing them too. 


Next is the swivel clip or you can just use a jump ring. I use the swivel clip to allow me to take each ribbon swatch off the main ring easily. 


Here I have removed the swivel clip just for the purpose of taking the picture. You need to bend the eyepin over and trim so that the free end tucks back into the bead cap. Make sure you have tucked it in well. 


Here is the finished swatch. Of course yours will have more ribbons on but it was easier to take photos this way.


Please pop back and let me know how you get on. It's really easy to do (if a little fiddly) and your customers will love being able to see the ribbons in all their technicolour lovelyness!!!

I hope you all have a lovely day whatever you are doing .

Saturday 29 June 2013

Sunshine and Stampin' UP!


It's a gorgeous day here by the sea and so after a walk to the beach and some housework I thought I would show you a couple of cards from a recent class. 
First though a picture of the gorgeous blue skies which are overhead at the beach today.

Back at home and in the garden for this lovely sunny shot of a tunnel card. This card features some retiring product as well as some that are staying. If you still have items you want from the 2012/2013 Stampin' UP! catalogue then you need to contact me this eve. I will be placing my last order tomorrow morning and some items are already be retired and no longer available.
I love the 'splodge' from French Foliage and will be sad to see it go but I can tell you there is something which while not the same will work equally well!


This card is one that featured in a class but I loved it so much I took it to a recent shoebox swap with other Stampin' UP!  demos and I'm pleased to say they liked it too. It's always so nerve racking to showcase your work in front of fellow demos....


Here is the last of the cards I wanted to share with you today. This is a 'Joy' fold card and closes up nice and flat for postage. I love the sunny yellow papers and again I will be sad to see them go tomorrow but equally excited to be able to order the new papers on Tues. 


If you are excited to see the start of a new Stampin' UP! catalogue year and want to get up close and personal with some of the new product as well as have the chance to get your hands on some bargains in my 'Retirement' sale then please come along to my open house on SUN 7th JULY 10am-2pm. It's a drop in but if you would like your own copy of the new catalogue then please contact me using the button at the top right to let me know you are coming and I will have your catalogue waiting for you. Cost is just £5

Thursday 27 June 2013

Stampin' UP! sneak peek...

Hello and firstly an apology for having been absent for so long... Its been a crazy busy month here as we prepared for the Nutty ones trip to Afghanistan. He is there now and we are nearing the end of the first week without him.
As for me I am making full use of the theraputic properties of crafting and passing the time creating lots of yumminess.

It's some of that yumminess I'm going to share with you today.... Last night was my first Christmas Stamp Club of the year and 6 lovely ladies joined me to make 10 cards with 2 ladies ordering kits to do at home. We spent a lovely 2 ish hours crafting and laughing and they all went home happy to have started the mammoth task of handcrafted Christmas cards. By the time we reach the end of Nov they will have 60 handcrafted cards without even thinking about it. 

Here is the first of the cards they made. A simple card with little dimension so you don't have to break the bank on postage!

The second card has a little more dimension and but is still post friendly


Both cards use a fabulous new set from the up coming  Stampin' UP! Catalogue 2013.
The set is called Mosaic Madness and as well as the very 'Morocan' feel this stamp set has it is great for Christmas Baubles! The set has a matching punch and embossing folder all of which can be ordered through me from 2nd July. 

There is still time to join the club either in person or via kit and have 50 cards made ready to send. Use the 'contact me' button for more details 


Saturday 25 May 2013

Swap Inspiration


Recently a large group of Demo's met up at Telford for a day of training. As always on these occasions we take along cards that we have designed and made in multiples (I took 80 this time) and we swap them with other demo's. It is a great source of inspiration and a fab way to catch up with old friends and make some new. 
I always manage to find great inspiration in the swaps as well as being able to use them to showcase a wide selection of stamps and products in the catalogue. It is also a good way to demonstrate different styles as we all have our own. Another reason to love the Stampin' UP! way. 
We create what we love and share with others so they may create too.

One of the swaps I received on the day was from the lovely Lynne Fahey of Spiralz and Curlz. I met Lynne at a retreat weekend last year and we soon became friends when we realised not only did we share a love of Stampin' UP! but we also had the same OCD's and love of life. 
Lynne creates the most beautiful cards and demonstrated a FABULOUS technique at Telford. 

Here is Lynne's swap on the day. Isn't it just gorgeous?   

A close up of the stamped detail and some glitter.


I loved this card and when designing for my recent Fancy Fold Class I took inspiration from Lynne's design for this card.
A Four Fold Card which uses the lovely Swallowtail stamp on the front.


Which opens out to reveal more stamping and the centre panel which in this instance I used the design from Lynne's card. I loved the idea of stamping over the Newsprint DSP to give a nice depth to the image without adding bulk to the card.. This means my card stayed post friendy. 


Here is the card fully opened out. 


I'm pleased to say when I sent a version of  this card to Lynne as a Thank You for the inspiration and for being such a good friend she loved it. 

There is no better feeling than making someone smile and what a lovely way to do that. 

If you would like to make some one smile or indeed join in with the swapping then please get in touch and ask about classes or joining the Stampin' UP! family.  

Wednesday 15 May 2013

Floral Frenzy


Those who follow my blog will remember I promised photos of the 3D projects I was working on a while back. At the time of creating it was all quite secretive and here's why.

A while ago I was asked by my lovely upline Monica to create a display for our Team Training. I was sooooooo honoured but scared at the same time. I mean this is a room full of my peers, all people with so much talent. Would it be good enough to inspire? 


A close up of the flowers.. 


Some more delicate blooms and a hint of what's to come.


Here's the finished piece. The birdhouse, plant pot, and flowers were all made using Stampin' UP! cardstock. 

As you can see it was quite a large display and I'm looking forward to including it in my displays this year. 

There was a second part to my display and I will be back to share the photos of that later this week. 

I hope you enjoyed the finished project and it inspires you to think big and create big 

Tuesday 14 May 2013

Stampin' UP! Regional Training...

Saturday was a day of fun and frolics at regional training for Stampin' UP! demos.
I travelled down with the lovely Zoe Tant and some of her team. We left VERY early and after a slight detour courtesy of my sat nav we arrived just as they were starting.

The whole day was full of lovely presentations by fellow demos and some business thrown in for good measure. 
At all of these days we are treated to make and takes to ensure we get inky. After all who could be in a room full of inspiration and not want to get inky!

The project I'm showing today is the note book we got to make. It is full of detail and scrummy texture.


A close up of the scrunched flower and Vintage Faceted Designer Buttons.


Here is the project in full. I love the pop of colour and the happy feeling this little note book seems to ooze. I will be keeping this with me to capture inspiration as it strikes!

Be sure to pop back to see more of the weekends fun and frolics.


Sunday 12 May 2013

Apologies and Anniversaries

Wow, has it really been almost a month since I last posted? 

I apologise for the absence but it has been crazy busy here with lots of renovation going on and I have been making lots of cups of tea and making sure everything is how it should be! 
We have now finished the first of the attic bedrooms and it looks lovely in Island Indigo and Whisper White - You can take the girl out of the craft room but not the Stampin' UP! out of the girl lol.
We are now busy on Caiden's room which will be River Rock and poss Lucky Limeade.

Back in the room of craft, which seems to be my only haven right now, I have been busy with some commission pieces which I will share with you all soon. 
I took time out though to make a card for a lovely couple who just celebrated their 9th Wedding Anniversary.
The lovely June and Andy run Lady B's Cupcakery here in Mablethorpe and keep me in delicious cakes(almost daily lol) as well as a Champagne High tea for my birthday last week!

The card needed to be soft and slightly vintage. As a fellow creator June has a fantastic eye for colour and detail so no pressure lol.  


Close up of the personalised element


Here is the finished card which I hope they both liked. 
The base card is embossed only on the bottom half with the Honeycomb Embossing Folder and then torn strips of Blushing Bride (a colour I am so happy to see returning) and Naturals Ivory. 
The hearts are stamped and die cut using the Hearst a Flutter Bundle.

The sentiment is from a retired hostess set but fitted the couple so well I just had to use it.

I hope you like today's post and I will try and post some of the highlights from Regional Training yesterday soon.


Wednesday 17 April 2013

Spreading the sunshine...


Another Wednesday draws round and its time to hop over to Julia at Stamping Ground and nose around the desks of the creative and this week I even have a completed project to show you! 

It's been a busy few weeks for this little Mermaid and for those of you waiting to see the secret projects please pop back tomorrow when I will be revealing the first - The Wedding Cake.
I finally had some time to play just for me this week and here is my desk while the light was good yesterday. I know lots of you comment on the tidiness of my desk so here it is in working order and about as messy as I can bear to be lol. 
To the right is my scrapbox which is going to be the feature of a new challenge post I will be setting up (more details to follow).
Embossing powders, reinkers, stamps, vellum and a hot glue gun are spread out over the rest and all came together to create.........  

This little hanging. I just have the ribbon to add and this will be the sunny little greeting to all who pop by for a cuppa


I hope you have a lovely week and be sure to pop back for a look at the projects which have been such a secret until now

Friday 12 April 2013

Its all about the colour...

It's continuing to be a very exciting time in the Stampin' UP! calender. First we had all the lovely free stuff you could earn during SAB and now just as we demonstrators get ready to mourn the loss of 5 amazing colours we have this announcement... 


Stampin' UP! are always bang on trend with their colours and so to keep the palette fresh we are saying goodbye to some old favourites and welcoming some new. 
Now this may seem scary but in fact several of the colours are already in our palette they are just joining a new group of friends as they move families. A couple are like long lost family members and are returning from the In colours that retired last year. A couple are visiting us from over the pond as they are old colours from the US which didn't make it to the new market over here. Lastly we have a brand new addition to the family and this is the one that excites me most lol. A lovely light grey! I know of all the colours we are getting with the new catty I have to go for a grey. 

Sadly this means we have to make room and so we will be saying goodbye to a few of our favourite shades. I will be stocking up on a couple of my personal favourites for personal use and encourage you to do the same as the colours leaving us are now only available while stocks last.

Lastly we will also have 5 brand new colours join us when the new In Colours are added to the family.

I do hope you are feeling as excited as me about the changes to our colour family and the opportunities this brings us to freshen our crafting and explore new and exciting combinations. 

I will be back with more exciting news soon


Wednesday 10 April 2013

Stampin' UP! a storm.....


Wow another week has passed and here we are again taking a peek at the desks of the creative curtesy of Julia over at Stamping Ground

As you can see the desk is still looking pretty tidy, I just wish I had remembered to take a photo when it was at its messiest this week. I really do make a mess sometimes honest!
To the left is a scrapbook page of my Nanna and Grandad on their wedding day which I am working on. I reached the point of 'do I need anything else on there' so decided instead of fretting about it I would catch up on some admin and give my brain time to rest lol. I find that the best way to asses things and so busied myself with sorting out my cardstock according to the new colour refresh we are undergoing. It should help me use up cardstock before it retires. 
Also on the desk are 40 (!) swaps for Sun and some booking forms for future craft fairs. 
The eagle eyed among you might have spotted something floral at the back of my desk and this is one of the display items for Sun when I can finally reveal all the Shhhhh! projects I have been working on.

Be sure to pop back next week to see them all revealed.

Till then Happy Crafting and Hopping

Wednesday 3 April 2013

Sneak Peek and WOYWW - 200

Its been another crazy week here by the sea and this little mermaid is shattered.... No rest for the wicked though and the desk is ready for another secret project which I will be able to share after the 14th April. 
All this loveliness going on and I cant share any of it.... Sorry folks!
However if you want to see what everyone else is up to be sure to head on over to Julia at the Stamping Ground and see the desks of the creative around the world.

I will leave you with a sneak peek of the Wedding Cake I was busy with last week...


Be sure to pop back after the 14th April to see this and the other secret projects in better detail.

Hope you all have a fab Wed and remember to fit in some crafting - its good for the soul

Wednesday 27 March 2013

WOYWW - 199

Wow another week has flown by and here we are again looking round the desks of the creative folk with Julia at Stamping Ground  

My desk this week is looking a bit on the bland side and again its another project in the making. A wedding cake this time all made from cardstock and papers. As you can see the bottom tier is assembled and I just have another 3 to go before I can start adding detail. A friend and I sat last night and punched hundreds (and I mean hundreds!)  of Itty Bitty flowers, hearts and butterflies. Hopefully I will have it finished in time for next weeks visit.
 Last week I had a beach hut half formed and I am pleased to say this is how the mini version turned out. The big version is just waiting for its life ring which I will be adding this morning as a punch arrived yesterday that I needed. Funny how you never have the right diameter circle punch to hand despite owning more than I should lol.

And here is a pic too cute to resist... Even my little boy gets fun out of my craftyness!


Hope you all have a fab week and please be sure to leave some comment love so I can return the visit.

Wednesday 20 March 2013

Shhhh its a surprise!


Its Wednesday again folks and that means time to whizz round the world one desk at a time with the lovely Julia from WOYWW
Its been a while since I joined in as I've been soooooooo busy and although I am busier than ever I am determined to find time on a Wed to travel the desks.  

Here is my desk looking very busy this morning. I'm preping for a very special display and that's all I can say for now! I have been enjoying getting messy with some new techniques as you can probably tell from the  2 A4 sheets of acetate to the left of my desk. 

No self respecting Mermaid would be without a holiday hideaway so the beginnings of a beach hut are there too.

I hope you have a lovely Wed wherever you are and happy hopping


Tuesday 19 March 2013

Simply Stampin' Up!

The sun is shining here by the sea and I have been busy crafting away getting ready for the Alford Craft Fair over Easter weekend.
Now anyone who know me knows my usual style is about as far removed from the CAS style (clean and simple) as you can get but I decided to challenge myself with these little notelets which come in packs of 20 with envelopes for just £5.50 from Stampin' UP!
I have divided them up into packs of 5 and these will be on sale at the craft fair.  

I kept to the Subtle range of colours and each pack contains the same design but in 5 different colours. For this first pack I punched a Decorative Label from a piece of scrap paper and used the negative to sponge through. The butterfly is from Papillion Potpourri and is stamped onto a piece of white cardstock, punched out and adhered in the centre only to give the wings a bit of lift.

This close up shows the dimension of the wings in greater detail.

This next pack uses the Reverse Masking technique which is like the technique above only you also use the negative to stamp through so you only get the image you stamp contained within the area you punched out. A fancy name for a simple technique!

I used Serene Silhouettes and the Subtles colour palette again to achieve a softness to these notelets. I used Basic Grey ink instead of black to keep the image soft.

Here you can see the sponging in greater detail. I love how you can get such a variation in tone using this effect.

I was pleased with how they turned out and for once didn't feel the need to add more to fill the white areas.

I hope you enjoyed my CAS attempts and if you would like to know more about these techniques or where to get the products used then please contact me using the button on the right. 

Thursday 14 March 2013

Stampin' Up! Springtime....

The weather here in the UK and in particular by the sea may not be very spring like but with the gorgeous colours from Stampin' Up! and the Subtles range I am able to bring you a little spring sunshine this morning.
These adorable little guys are chicks, enjoying the fresh spring air, made from Stampin' Up!s Build a Bird punch. Just a small tweek to the tail and hey presto Easter Chicks! 


Here they are in full view and the rest of the page too. 

This is my design for a Spring themed challenge set by one of my lovely friends.
You can't see very well in this photo but I sponged Craft White over the Bashful Blue to give the effect of soft spring clouds and then sponged Certainly Celery onto the Certainly Celery cardstock to give the effect of grass. The eggs are punched from DSP using the small oval punch and the bows stamped on from the Create a Cupcake Stamp set. 
The bunting is from the Pennant punch and will have the title put on when I find the right photo. The Very Vanilla mat is where the photo will go and it tucks nicely behind the grass.
Finally a few flowers scattered around punched from the Itty Bitty Punch

I hope this brightened up your day and spring arrives with you all soon x